
I'm constantly searching for a homemade pizza dough that tastes good but isn't too challenging to execute. In other words, a recipe that doesn't require any arcane "dough whispering" skills. However, my hunt may be coming to an end thanks to one celebrity chef's concept.
Making bread or any rising dough is difficult, so it's hardly surprising that many sculptors go into the bread-baking business. In my experience, it requires patience, practice, and something of a magic touch.
Jamie Oliver's 30-Minute Meals: Cheat's Pizza
I've tried Jim Lahey's no-knead pizza dough recipe with great success, but I'm always looking for fresh variations, so one particular recipe from Jamie Oliver's 30-Minute Meals caught my eye. His "cheat's pizza" sounded like an interesting alternative to traditional recipes, and like everything else in that book, it takes 30 minutes or less to make from start to finish.
Actually, this could only take you 20 minutes if you're more experienced since this is just one aspect of Jamie's 30-minute meal. The remaining parts of the meal include three delish salads and squashed cherries and vanilla mascarpone cream. Here, we're only focusing on the pizza.
Jamie's pizza is indeed a cheat's — you don't have to agonize over that precise point between over- and under-kneaded dough or wait for the dough to rise. Instead, you sneak in a food processor and self-rising flour.
It's also quick to assemble and cook: Simply stove-fry the dough for three to four minutes, and finish under the broiler for the same. The result? Not bad. Pretty decent, in fact. It won't have the wonderful elasticity that the best pizza dough has, but if you like a light, crispy crust, you should be able to nail a tasty outcome in two attempts or less.
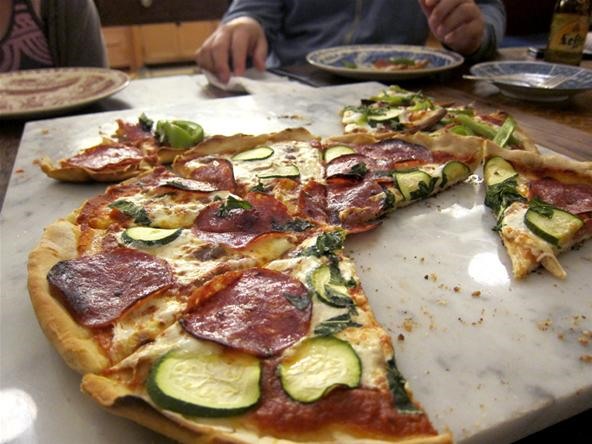
The recipe below should feed two to three people. I doubled it and made two batches of the dough for four people; this yielded one large pizza, and two smaller ones (dictated by my cast iron pan options).
Jamie's Cheat's Pizza Ingredients (Serves 2)
Aside from the ingredients listed below, you'll also need a food processor, broiler-safe or cast iron pan, blender, and a measuring cup that can hold at least one cup.
- 1 c. self-rising flour
- ½ c. water
- pinch of salt
- 1 can chopped or crushed tomatoes
- 1½ handfuls of basil leaves
- 1–2 cloves garlic
- fresh mozzarella cheese
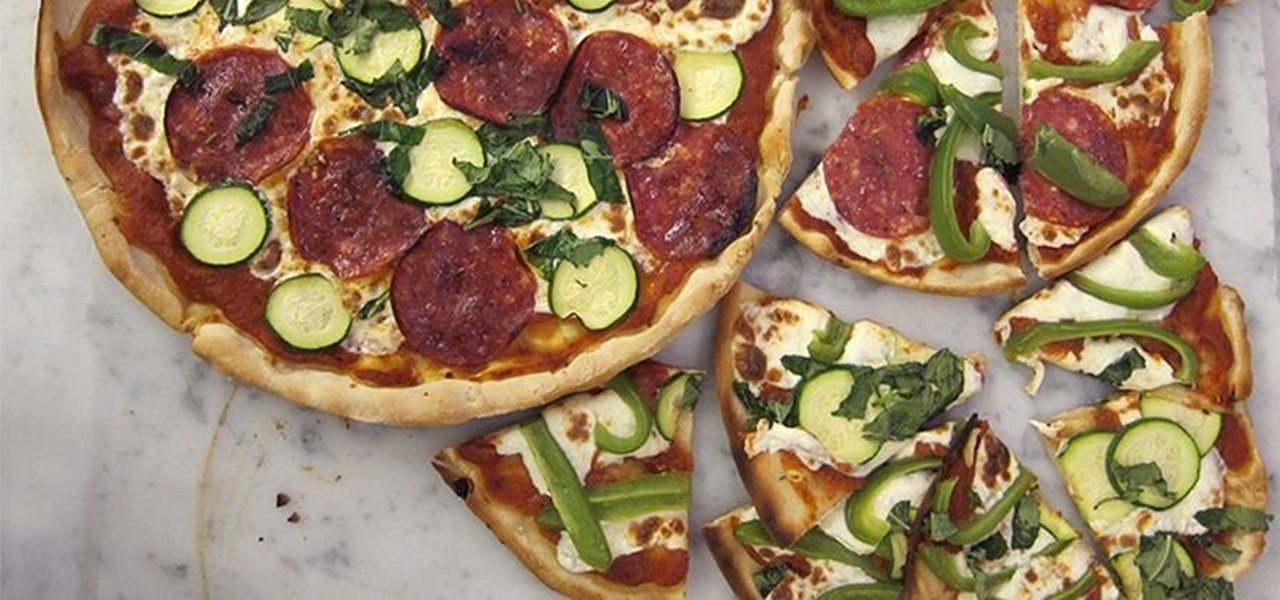
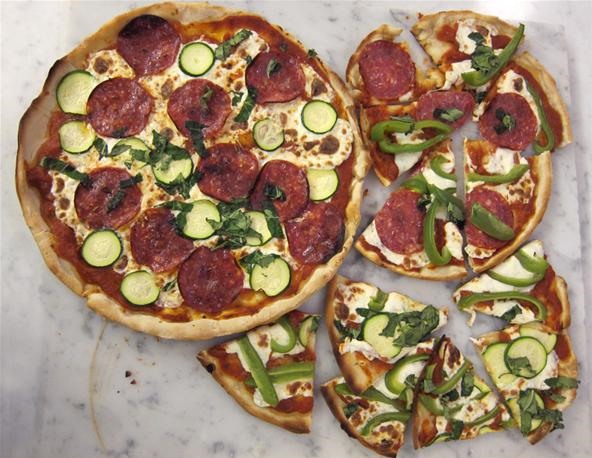
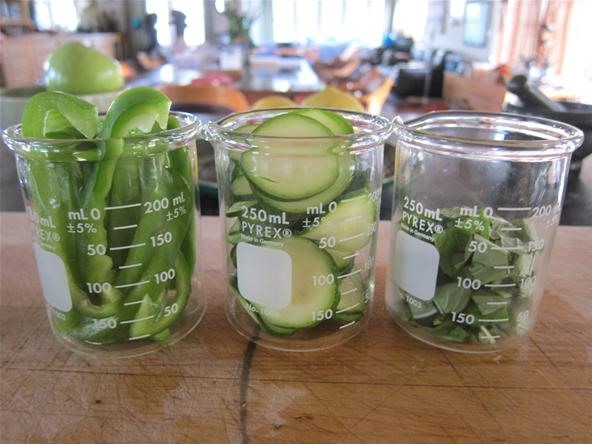
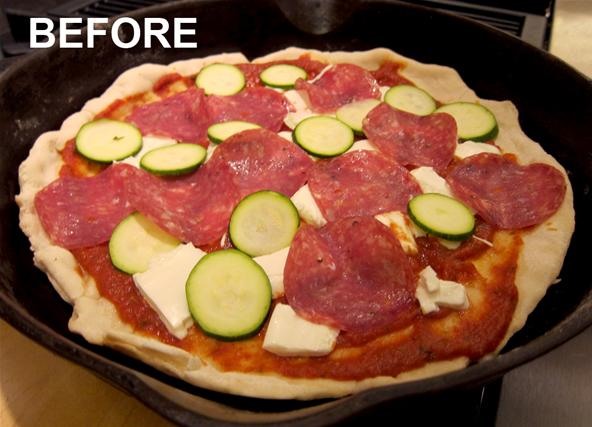
- toppings of choice (I used thinly sliced dried salami, green bell peppers, sliced zucchini, and basil)
- balsamic vinegar
- olive oil
Step 1: Gather Your Ingredients
"30-Minute Meals" is kind of a shticky TV concept. The time it takes you to prepare the pizza is entirely dictated by how organized you are and how comfortable you are with the process, as well as how speedy you are in the kitchen period.
The first time I made it, I took about an hour, but the second time I was much more comfortable with the process and managed to do it in about 30 minutes. Since I doubled the ingredients, I'm sure it would have taken even less time.
Before you start, take out all your ingredients, set up your food processor and blender, and oil your cast iron pan. Also, make sure to turn on the broiler and pull out your measuring cup.
Step 2: Prepare Your Sauce
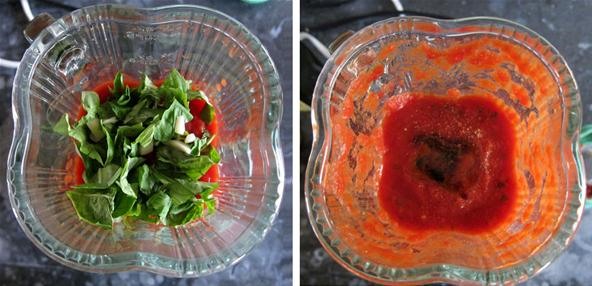
You can use any sauce you like — canned, jarred, or fresh. Jamie recommends a quick option that combines a canned tomato base with fresh ingredients. The 28 oz. can size seen below is more than enough — I probably only used a third of it for four people, so you should use a smaller can.
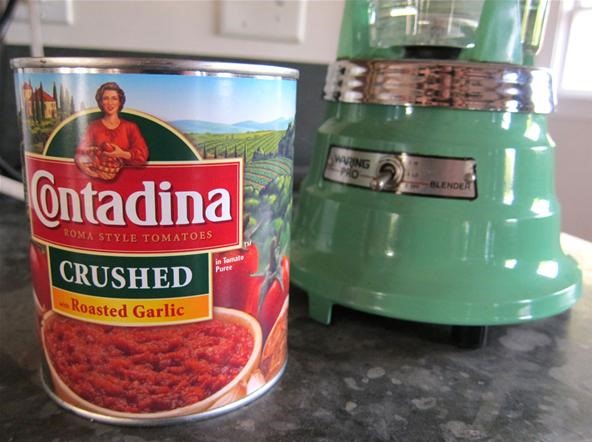
Open and empty a can of crushed or chopped tomatoes into your blender. I used one with roasted garlic, but you can choose any variation you like.
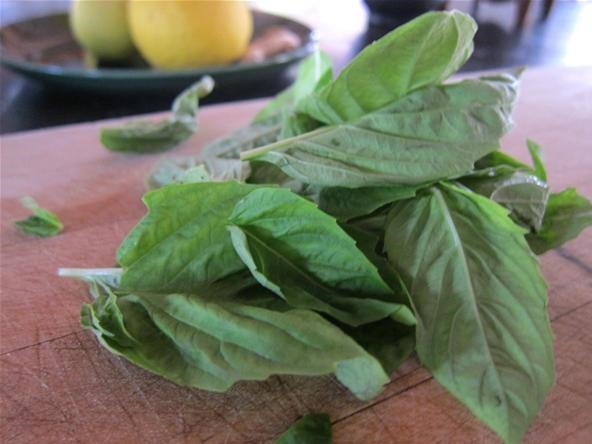
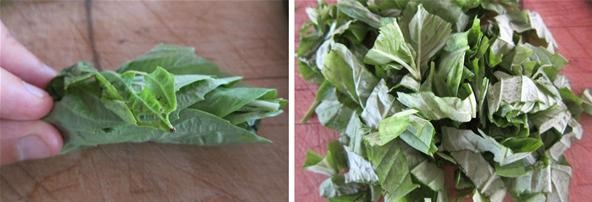
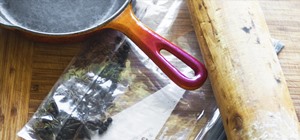
Chop about 1½ handfuls of basil (you will use 1/3 now for the sauce, 2/3 later for the pizza topping). Jamie recommends rolling your basil for easy chopping, a process is called chiffonade. See below.
Roughly chop 1 to 2 cloves of garlic, then throw the garlic and basil into the blender with the canned tomatoes. Add a swig of balsamic for taste, then drizzle some olive oil inside and blend to a smooth consistency.
Step 3: Make Your Dough
This is the easiest dough I've ever made! It even beats Jim Lahey's no-knead bread (though, I'm not sure it tastes as good).
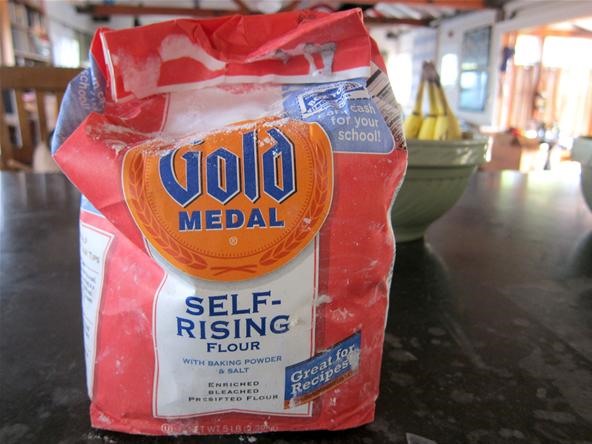
Measure 1 cup of self-rising flour (it must be self-rising flour — no substitutes!) into your food processor. Add ½ cup of water, a drizzle of olive oil, and a pinch of salt. Pulse.
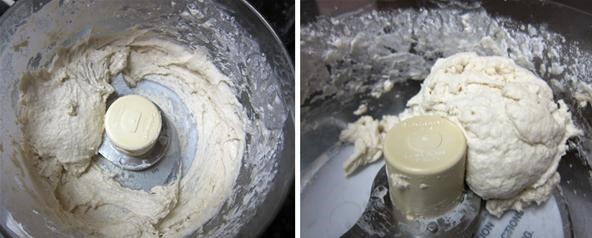
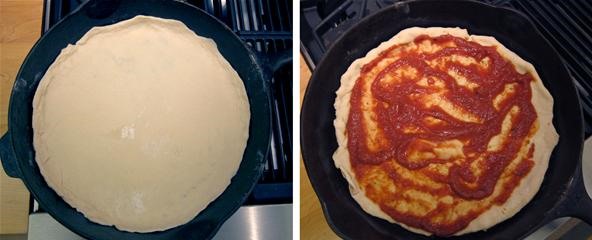
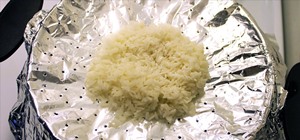
Your first pulse will result in a soft, wet dough that looks like the above image to the left. The goal is to work toward a firmer, processor-formed ball as pictured to the right. Do this by slowly adding more flour — I added as much as an additional 1/3 to ½ cup. In the end, you want your dough to be somewhat wet and elastic, but not so wet that it's impossible to work with a rolling pin.
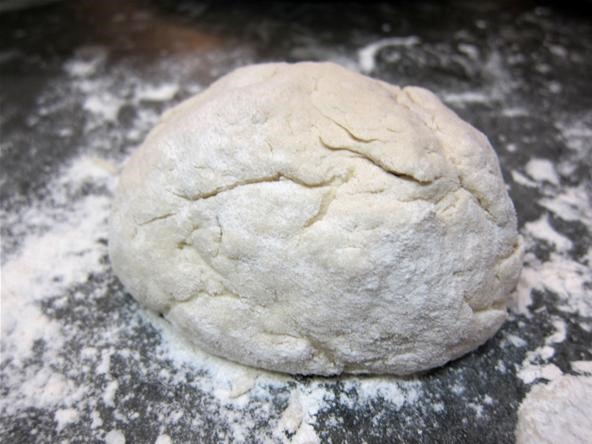
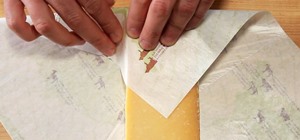
Once you have a satisfactory ball of dough, cover a dry surface with a layer of flour. Remove the dough from the processor and add the remnants to your solid "baseball"; coat lightly with flour and roll into a flat, round piece with a rolling pin.
Jamie recommends that the dough be about 1 cm thick. In my second round with this recipe, I made it a little bit thinner and liked the results better (it had a thinner, crispier crust).
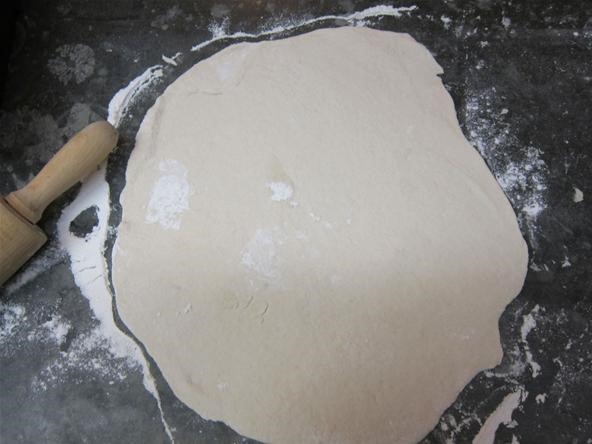
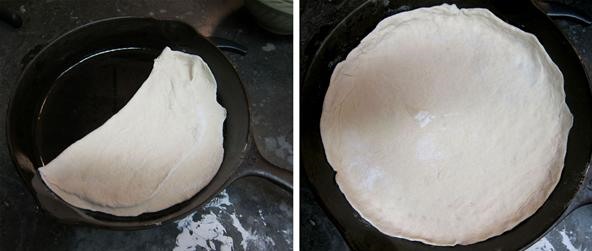
Once you have a good thickness and large enough piece to fill an approximately 14-inch cast iron pan (or two smaller pans), fold your dough in half or quarters to easily transport to the well-oiled pan. Unfold and spread/smooth slightly with your fingers if necessary.
Step 4: Prepare Your Toppings
Before you start cooking your dough, you should have your sauce, cheese, and toppings on hand. Have all your toppings chopped — I prepped bell peppers, zucchini, basil, and thinly sliced dried salami.
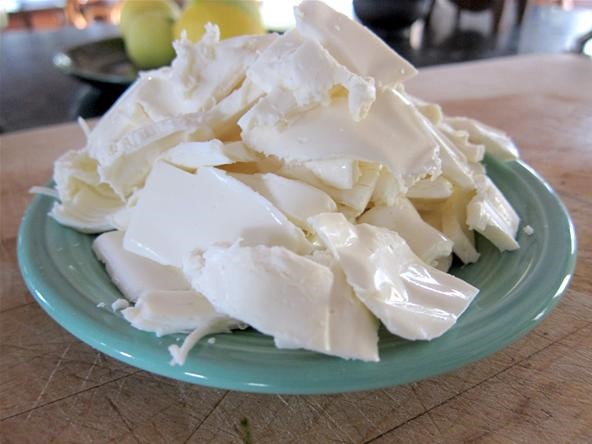
Use fresh mozzarella! It tastes better than the shredded stuff. Tear it into chunks beforehand.
Step 5: Fry Your Dough
Now for the fun part! Turn the heat on high, and let your dough get crispy. Stand by with a spatula and lift the edges to make sure the bottom isn't burning (this is why coating the pan with olive oil is so important — you don't want the dough to stick to the bottom).
You want it to get it crispy, but not charred. Let it go for 3 to 4 minutes, and once it's almost finished, spoon sauce in the center and spread. Remove from the heat entirely, and top with cheese and toppings. If you're using fresh basil like me, hold off on that until the next step.
Step 6: Broil Your Pizza
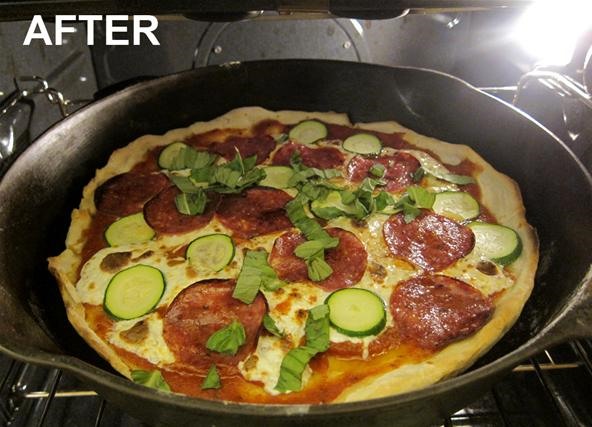
Now that your pizza is ready, place it under the broiler for another 4 minutes or so. Leave the oven light on and watch it carefully. Remove when it looks good to you. If you want fresh basil on it like in my version, wait until the last second when you're about to remove the pizza from the broiler — that way the leaves will be warm and slightly cooked without being charred.
Jamie added fennel seeds and freshly grated Parmesan to the top of his cheat's pizza as well — I'm going to try that next time because it sounds delicious.
Step 7: Enjoy!
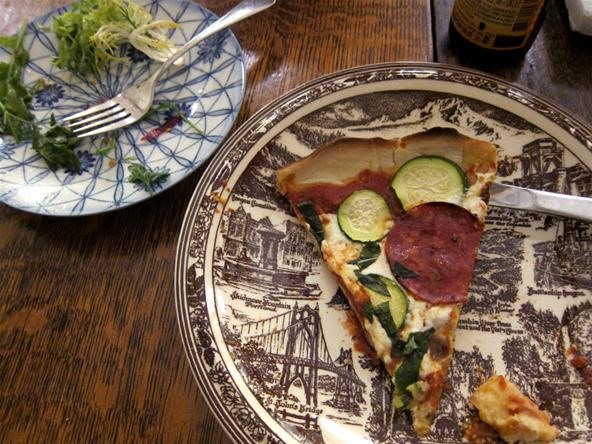
Eat, savoring the cheater's satisfaction of a cheesy, tomato-slathered crunch stolen from right under the noses of the pizza dough purists.
If you know of a good pizza dough recipe, please post below. I'm always looking for new ones, even after almost mastering this one.
Just updated your iPhone? You'll find new emoji, enhanced security, podcast transcripts, Apple Cash virtual numbers, and other useful features. There are even new additions hidden within Safari. Find out what's new and changed on your iPhone with the iOS 17.4 update.


17 Comments
Beautiful pictures, very inspirational!
thanks! :)
It's colorful and looks pretty easy to make. Definitely something to try out once I get a cast iron pan. Are there any other pans that would work without breaking the bank?
i used both a cast iron pan and a regular teflon pan with a metal (not plastic) handle. Though my friend was concerned that the temperature for broiling was too hot for the teflon pan (it came out fine.. i'm not sure how to gauge whether it's ok or not). cast iron pans aren't too pricey if you buy from amazon or target.
You can also try buying used at a flea market. :)
is the top of the dough still soft/raw looking when you put the sauce/toppings on top? or is the dough pretty much fully cooked ?
it's still soft on the top, but should be golden brown/crispy on the bottom.
I love the idea of zucchini & basil on a pizza. Easy to grow them in my back yard for an extra fresh slice.
That reminds me...my mom just gave me a giant zucchini. Time to start using it up!
looks delicious, can't wait to try.
The before and after pics look awesome. I'll have to try this out. I'm always afraid of messing up dough.
Do you think this would work without first frying the base? For instance by putting the dough on a pizza baking oventray (non-stick metal with perforations all over so the hot air gets to the bottom of the pizza)?
can i use pan square griller to cook the pizza since it is a heavy base frying pan? my pizza dough is round. I have a small cast frying pan but it is not heavy base enough and a bit deep frying pan. I am afraid I will be in trouble when comes to lift the ready dough pizza.
Need yr comment Jamie. tx.
I'd been meaning to try a cheat or scone base pizza base for ages. Needed a bit of translation (and thankfully I have an old Tala measure that does cups,oh when will the USA get the metric system...) and I tripled the quantities to then divide into two pizzas to share between three people ( keep up...)as my heavy duty frying pan ( really just need one without a plastic handle and probably not a non stick one) is quite big. Worked a treat, although needed slightly longer 'frying' than suggested. Not an authentic, wood fired oven thin and crispy pizza but certainly very pizza like and better than supermarket alternatives - and yummy pizza from walking in the kitchen to on the plate in less than 30 minutes including making a salad!
Not quite convinced by the sauce recipe as I think that would be too watery ( maybe I buy cheap tinned tomatoes)but I happened to have some in the freezer.
You don't need to use an official US "cup" measure for making the dough. Any regular coffee cup will work, it is just a simple way to have a 2 to 1 measure of flour to water.
Instead of oiling the pan I sprinkled Semolina on the bottom. It made it nice & crispy like the pizza shop plus healthier option ??*
I'd really love to print and use this recipe because I don't use my tablet or computer in the kitchen. To bad there isn't a way to do it. You'd think any site that does recipes would give that option. :(
Super recipe. it's simple and should be very tasty
Share Your Thoughts